インストール中にエラー
買って間もないMacにXamarinをインストールしようとしたらこんなエラーが
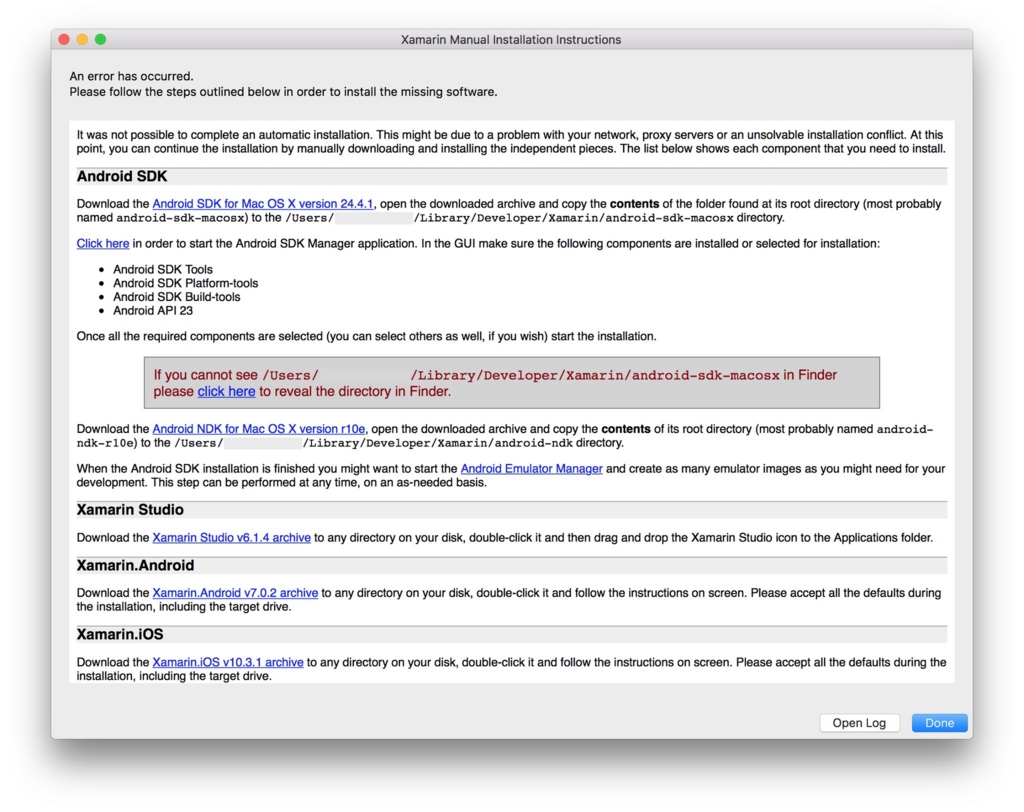
正直新規マシンでこれが出ると結構諦めモード入りやすいです^^;
エラー内容
Xamarin Manual Installtion Instructions
An error has occured.
Please follow the steps outlined below in order to install the missing software
It was not possible to complete an automatic installation. This might be due to a problem with your network, proxy servers or an unsolvable installation conflict. At this point, you can continue the installation by manually downloading and installing the independent pieces. The list below shows each component that you need to install.
Android SDK
Download the Android SDK for Mac OS X version 24.4.1, open the downloaded archive and copy the contents of the folder found at its root directory (most probably named android-sdk-macosx) to the /Users/my-user-name/Library/Developer/Xamarin/android-sdk-macosx directory.
Click here in order to start the Android SDK Manager application. In the GUI make sure the following components are installed or selected for installation:
Android SDK Tools
Android SDK Platform-tools
Android SDK Build-tools
Android API 23
Once all the required components are selected (you can select others as well, if you wish) start the installation.
If you cannot see /Users/my-user-name/Library/Developer/Xamarin/android-sdk-macosx in Finder please click here to reveal the directory in Finder.
Download the Android NDK for Mac OS X version r10e, open the downloaded archive and copy the contents of its root directory (most probably named android-ndk-r10e) to the /Users/my-user-name/Library/Developer/Xamarin/android-ndk directory.
When the Android SDK installation is finished you might want to start the Android Emulator Manager and create as many emulator images as you might need for your development. This step can be performed at any time, on an as-needed basis.
Xamarin Studio
Download the Xamarin Studio v6.1.4 archive to any directory on your disk, double-click it and then drag and drop the Xamarin Studio icon to the Applications folder.
Xamarin.Android
Download the Xamarin.Android v7.0.2 archive to any directory on your disk, double-click it and follow the instructions on screen. Please accept all the defaults during the installation, including the target drive.
Xamarin.iOS
Download the Xamarin.iOS v10.3.1 archive to any directory on your disk, double-click it and follow the instructions on screen. Please accept all the defaults during the installation, including the target drive.
This might be due to a problem with your network
とエラーメッセージにはあるので
複数のインターネット接続環境から試したのですが、ダメでした。
助け舟が
@ryoichi_obara こんにちは。Mac用統合インストーラーだと思いますが、Android SDKが指定の場所にないよ?とエラーが言っているので、個別にAndroid SDKをダウンロード、インストールして、再度お試しいただくと良いかと思います。
— 田淵 義人@エクセルソフト (@ytabuchi) 2017年1月13日
つぶやいた(ぼやいた?)ところ、助言を頂きました。
ありがとうございます!
Android SDKをインストール
ちなみにXamarin InstallerではXamarin.Androidのコンポーネントを選択するとDependenciesにAndroid SDKが追加でチェックが入っているのですが、これがどうもうまく入らないということでしょうか。
(Installerのプログレスを見ていた限りだと、Android SDK含めて数GBはDLされていたのでこれもちょっと不思議な所ですが)
手動ダウンロード&配置
下記のダウンロードサイトへ行き、コマンドラインツールの方を手動ダウンロードして解凍します。
記載時点では tools_r25.2.3-macosx.zip です。
(バージョンってエラーメッセージの24.4.1に合わせた方がいいんですかね?私は入手できる最新版の25.2.3を入れました)
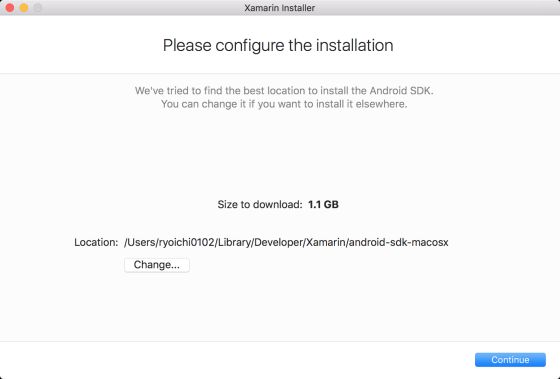
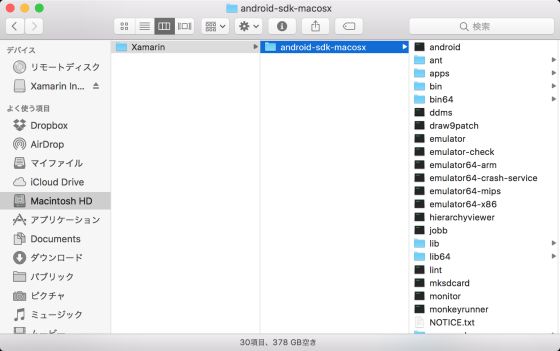
解凍して得られたファイルをXamarin Installerのウィザートの途中で出てくる
/Users/my-user-name/Library/Developer/Xamarin/android-sdk-macosx
に配置すればOKです。
(このディレクトリはインストールに一度はコケていれば存在すると思います。
LibraryはFinderからは通常は表示されないので⌘ + Shift + Gでアドレス入力します。)
